Estás leyendo la documentación para una versión de ROS 2 que ha llegado a su EOL (fin-de-vida), y oficialmente ya no cuenta con soporte. Si deseas información actualizada, por favor revisa Humble.
Using URDF with robot_state_publisher
Goal: Simulate a walking robot modelled in URDF and view it in Rviz.
Tutorial level: Intermediate
Time: 15 minutes
Contents
Background
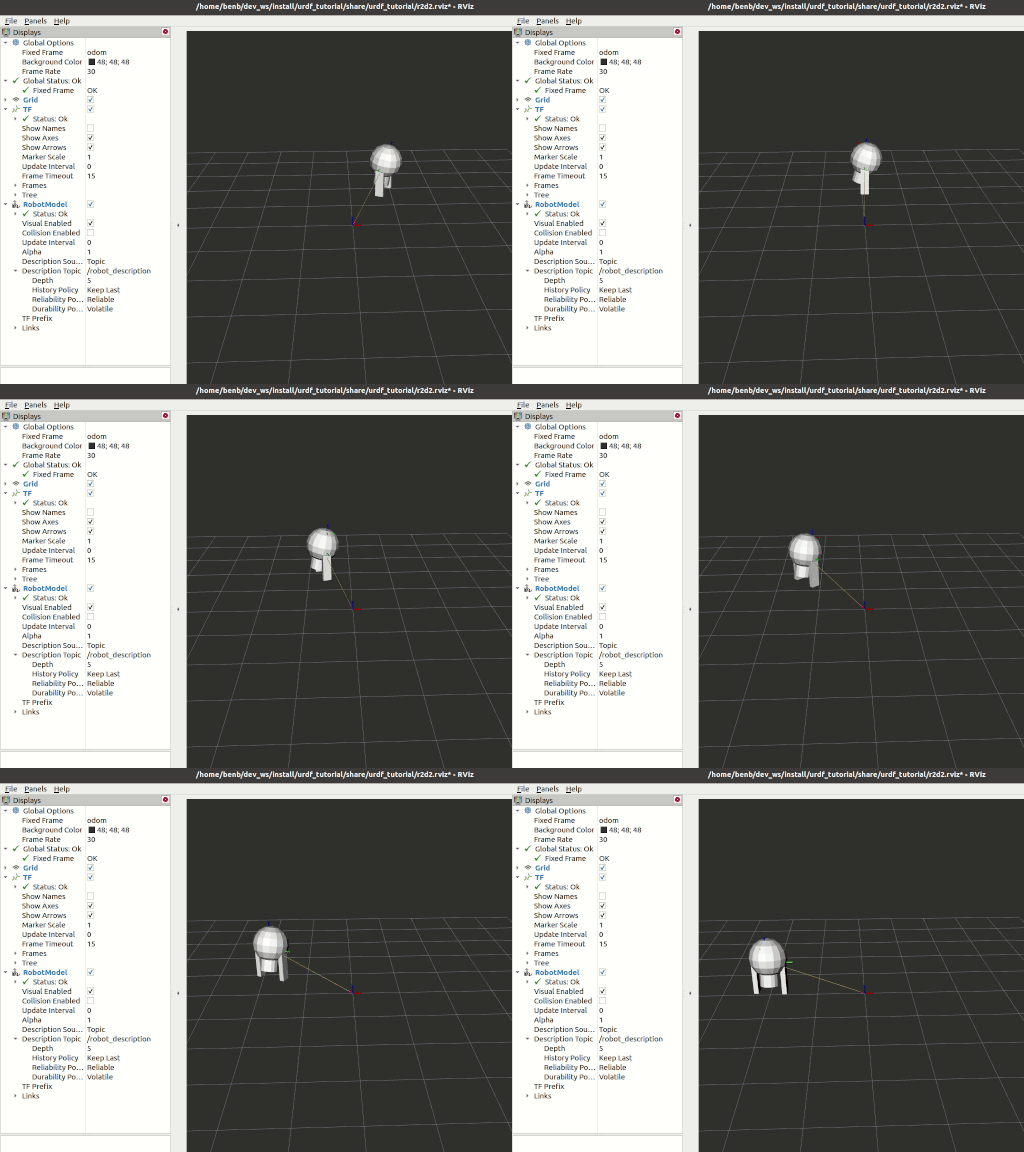
This tutorial will show you how to model a walking robot, publish the state as a /tf2 message and view the simulation in Rviz.
First, we create the URDF model describing the robot assembly. Next we write a node which simulates the motion and publishes the JointState and transforms.
We then use robot_state_publisher to publish the entire robot state to /tf2.

Tasks
1 Create a package
cd ~/dev_ws/src  # change as needed
ros2 pkg create urdf_tutorial --build-type ament_python --dependencies rclpy
You should now see a urdf_tutorial folder. Next you will make several changes to it.
2 Create the URDF File
Here is the URDF file for a 7-link model roughly approximating R2-D2. Save it as ~/dev_ws/src/urdf_tutorial/urdf/r2d2.urdf.xml
In order to view the robot in Rviz, save this Rviz config as ~/dev_ws/src/urdf_tutorial/urdf/r2d2.rviz
Note: Both files must be in the subfolder urdf
3 Publish the state
Now we need a method for specifying what state the robot is in. To do this, we must specify all three joints and the overall odometry.
Fire up your favorite editor and paste the following code into src/urdf_tutorial/urdf_tutorial/state_publisher.py
Note: Make sure to save it in the Python «urdf_tutorial» subfolder where the __init__.py file is located.
#! /usr/bin/env python
from math import sin, cos, pi
import threading
import rclpy
from rclpy.node import Node
from rclpy.qos import QoSProfile
from geometry_msgs.msg import Quaternion
from sensor_msgs.msg import JointState
from tf2_ros import TransformBroadcaster, TransformStamped
class StatePublisher(Node):

  def __init__(self):
      rclpy.init()
      super().__init__('state_publisher')

      qos_profile = QoSProfile(depth=10)
      self.joint_pub = self.create_publisher(JointState, 'joint_states', qos_profile)
      self.broadcaster = TransformBroadcaster(self, qos=qos_profile)
      self.nodeName = self.get_name()
      self.get_logger().info("{0} started".format(self.nodeName))

      degree = pi / 180.0
      loop_rate = self.create_rate(30)

      # robot state
      tilt = 0.
      tinc = degree
      swivel = 0.
      angle = 0.
      height = 0.
      hinc = 0.005

      # message declarations
      odom_trans = TransformStamped()
      odom_trans.header.frame_id = 'odom'
      odom_trans.child_frame_id = 'axis'
      joint_state = JointState()

      try:
          while rclpy.ok():
              rclpy.spin_once(self)

              # update joint_state
              now = self.get_clock().now()
              joint_state.header.stamp = now.to_msg()
              joint_state.name = ['swivel', 'tilt', 'periscope']
              joint_state.position = [swivel, tilt, height]

              # update transform
              # (moving in a circle with radius=2)
              odom_trans.header.stamp = now.to_msg()
              odom_trans.transform.translation.x = cos(angle)*2
              odom_trans.transform.translation.y = sin(angle)*2
              odom_trans.transform.translation.z = 0.7
              odom_trans.transform.rotation = \
                  euler_to_quaternion(0, 0, angle + pi/2) # roll,pitch,yaw

              # send the joint state and transform
              self.joint_pub.publish(joint_state)
              self.broadcaster.sendTransform(odom_trans)

              # Create new robot state
              tilt += tinc
              if tilt < -0.5 or tilt > 0.0:
                  tinc *= -1
              height += hinc
              if height > 0.2 or height < 0.0:
                  hinc *= -1
              swivel += degree
              angle += degree/4

              # This will adjust as needed per iteration
              loop_rate.sleep()

      except KeyboardInterrupt:
          pass

def euler_to_quaternion(roll, pitch, yaw):
  qx = sin(roll/2) * cos(pitch/2) * cos(yaw/2) - cos(roll/2) * sin(pitch/2) * sin(yaw/2)
  qy = cos(roll/2) * sin(pitch/2) * cos(yaw/2) + sin(roll/2) * cos(pitch/2) * sin(yaw/2)
  qz = cos(roll/2) * cos(pitch/2) * sin(yaw/2) - sin(roll/2) * sin(pitch/2) * cos(yaw/2)
  qw = cos(roll/2) * cos(pitch/2) * cos(yaw/2) + sin(roll/2) * sin(pitch/2) * sin(yaw/2)
  return Quaternion(x=qx, y=qy, z=qz, w=qw)

def main():
  node = StatePublisher()

if __name__ == '__main__':
  main()
4 Create a launch file
Create a new launch folder. Open your editor and paste the following code, saving it as launch/demo.launch.py
import os
from ament_index_python.packages import get_package_share_directory
from launch import LaunchDescription
from launch.actions import DeclareLaunchArgument
from launch.substitutions import LaunchConfiguration
from launch_ros.actions import Node

def generate_launch_description():

  use_sim_time = LaunchConfiguration('use_sim_time', default='false')
  urdf_file_name = 'r2d2.urdf.xml'

  print("urdf_file_name : {}".format(urdf_file_name))

  urdf = os.path.join(
      get_package_share_directory('urdf_tutorial'),
      urdf_file_name)

  return LaunchDescription([
      DeclareLaunchArgument(
          'use_sim_time',
          default_value='false',
          description='Use simulation (Gazebo) clock if true'),
      Node(
          package='robot_state_publisher',
          executable='robot_state_publisher',
          name='robot_state_publisher',
          output='screen',
          parameters=[{'use_sim_time': use_sim_time}],
          arguments=[urdf]),
      Node(
          package='urdf_tutorial',
          executable='state_publisher',
          name='state_publisher',
          output='screen'),
  ])
5 Edit the setup.py file
You must tell the colcon build tool how to install your Python package. Edit the setup.py file as follows:
include these import statements
import os
from glob import glob
from setuptools import setup
from setuptools import find_packages
append these 2 lines inside
data_files
data_files=[
  ...
  (os.path.join('share', package_name), glob('launch/*.py')),
  (os.path.join('share', package_name), glob('urdf/*'))
],
modify the
entry_pointstable so you can later run “state_publisher” from a console
'console_scripts': [
    'state_publisher = urdf_tutorial.state_publisher:main'
],
Save the setup.py file with your changes.
6 Install the package
cd ~/dev_ws
colcon build --symlink-install --packages-select urdf_tutorial
source install/setup.bash
7 View the results
Launch the package
ros2 launch urdf_tutorial demo.launch.py
Open a new terminal, the run Rviz using
rviz2 -d ~/dev_ws/install/urdf_tutorial/share/urdf_tutorial/r2d2.rviz
See the [User Guide](http://wiki.ros.org/rviz/UserGuide) for details on how to use Rviz.
Summary
You created a JointState publisher node and coupled it with robot_state_publisher to simulate a walking robot.
The code used in these examples can be found here.
Credit is given to the authors of this ROS 1 tutorial from which some content was reused.